Unraid Serial Crack

This is part two of a three part series of articles serving as a review and basic install walk-through for the storage server. It attempts to explain the tradeoffs and install details of the popular storage alternative to Windows Home Server (WHS). This guide is something like “I wish I had known this before I started.” In I introduced you to unRAID and explained my reasons for using it to build my next home server. In part two I explain the hardware requirements, preparation steps, and provide a complete walk-through of the unRAID installation process. Outline of Install • Discussion of hardware and software requirements • Prepare and boot the USB flash drive with the unRaid software • Verify that the hardware is functioning normally • Prepare hard drives with preclear • Configure settings in web interface • Add disks to the array • Format disks and parity • Create SMB/CIFS shares and set split level • Configure security, optional software, and headless operation Hardware Requirements Once you have decided to try unRAID, hardware is the first decision. Lime-Tech (the unRAID vendor) publishes a, but most systems beyond the list are supported.
Jan 31, 2019 Unraid is an enterprise-class operating system for personal and small business use that lets you configure your computer systems to maximize performance and capacity using any combination of OS, storage devices, and hardware.
Below are some basic guidelines when choosing a system configuration. CPU: If you are doing a small to medium sized build (~3-12 drives), then any CPU faster than 2Ghz will do fine. Memory: 2GB is plenty. I got two sticks of 1 GB RAM to take advantage of dual channel on the motherboard. Motherboard: The best have six SATA ports on the board. This gives you up to 10TB of protected data (using 2TB drives) without having to resort to an additional card. You want at least one PCI Express slot for potential expansion.
Also, there are some gotchas with network chipsets, but esp. Stay away from any Atheros NICs. Any video output is sufficient. Hard disk drives: unRAID has recently added support for Advanced Format drives and many unRaid users have used the Western Digital EARS green drives. These are not bad drives, but I made a mistake* with them that required me to rebuild my array. I would purchase the if I were starting from scratch, but any SATA hard drive will work. Power supply: Most Hard Disks consume less than 15 watts each, so the most important aspect is a single 12V rail that is rated around 400 watts.
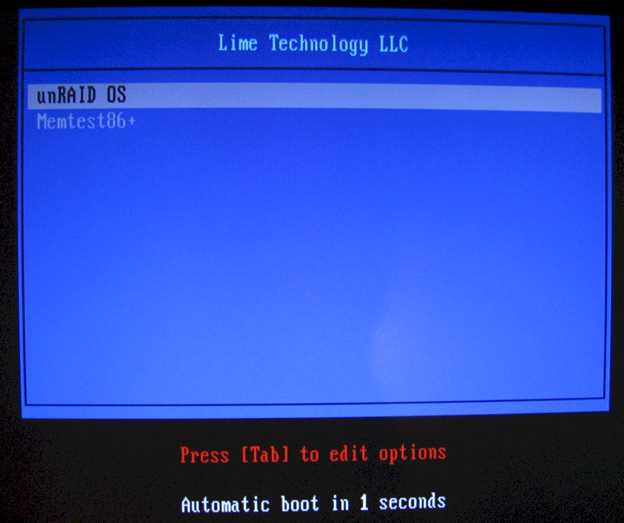
In addition to DIY, there are vendors who sell prebuilt unRaid servers: After some investigation, I decided on a budget motherboard that was not on the HW compatibility list. Below is my kit and the prices that I paid about a month ago (April 2011). This has been a solid config: • AMD $38.99 • ASRock motherboard $59.99 • 2x Kingston $25.98 • 1x HITACHI $74.99 • CORSAIR Active PFC Power Supply $44.99 • Rosewill (3x 120mm fans) $40 • Lexar 8GB $10 • 1x $69 or $0 for free version The total cost was $290 – $365 depending on using the free version of unRAID. Installation Process What follows is a lean version of the. It should be enough information and explanation to get a Linux newbie running with two data drives and a parity drive (the maximum for the free version) with the most recent version (4.7 Final) on a typical budget PC. UnRAID is installed on a flash drive that is used to boot the machine.
This is a nice feature because the OS does not take up a SATA slot that could be used for a hard drive. Also, if your motherboard fails, you can use the flash drive and your existing hard drives without having to rebuild the entire system.
Also, backing up your flash drive config is super easy. For this install, you will need: • An assembled workstation with a keyboard, monitor, and at least two hard drives • Internet access • A second computer with a web browser • USB flash drive • Some configuration files listed below You will need to in order to download some of these files.
After the install, the server can be headless (no keyboard or monitor) using a Telnet client, such as. After you register and login to the Lime-Technology forum, you will need to download these files: [1] [2] [3] Before starting the installation, you need to do some housekeeping of your BIOS: • Set your BIOS to boot from a USB • Set SATA access to AHCI mode • Check that your BIOS recognizes all of your drives Preparing your Flash Device for unRaid OS To make a bootable USB Flash device using Windows (XP/Vista/Win7), follow these steps: Attach your USB Flash drive and find ‘My Computer’ (XP) or ‘Computer’ (Vista/Win7) and right-click your Flash device. Click ‘Format’, set the volume label to UNRAID (this must be in all caps) and click Start. After the format is complete, click on your USB Flash drive labeled UNRAID and copy the contents of the unRaid Server zip file downloaded from above [1] to the flash drive. There should be a file named “make_bootable” at the root of the USB drive. Great basin serial killer. For Windows XP, double-click on the file ‘make_bootable’.